
Power Steering Upgrades

Having just finished up the power steering system on the R32 I figured it would be a good moment to take some pictures and make a post. For me, power steering has always just been something I've let be and when something broke or leaked I would fix it. When I first picked the R32 up it still had HICAS, which was first on the list of things to eliminate. As parts of that process I dumped tons of hard lines, which made things under the car and in the engine room much tidier. However, all the hard PS lines running under the motor and in front of the oil pan were still there. I didn't want them to be.
Originally, I bought that Chase Bays kit, which was probably not the best bang for the buck and I wasn't that thrilled with the kit. After I purchased it I ended up helping Eric from Kunigan put an Earl's setup together for his R32 Skyline (he now drives an S15). In the process I ended up replacing most of the Chase kit I picked up with Earl's fittings and lines. The Chase Bays power steering reservoir also went into a box and I picked up a nifty ex-Nascar reservoir off ebay.
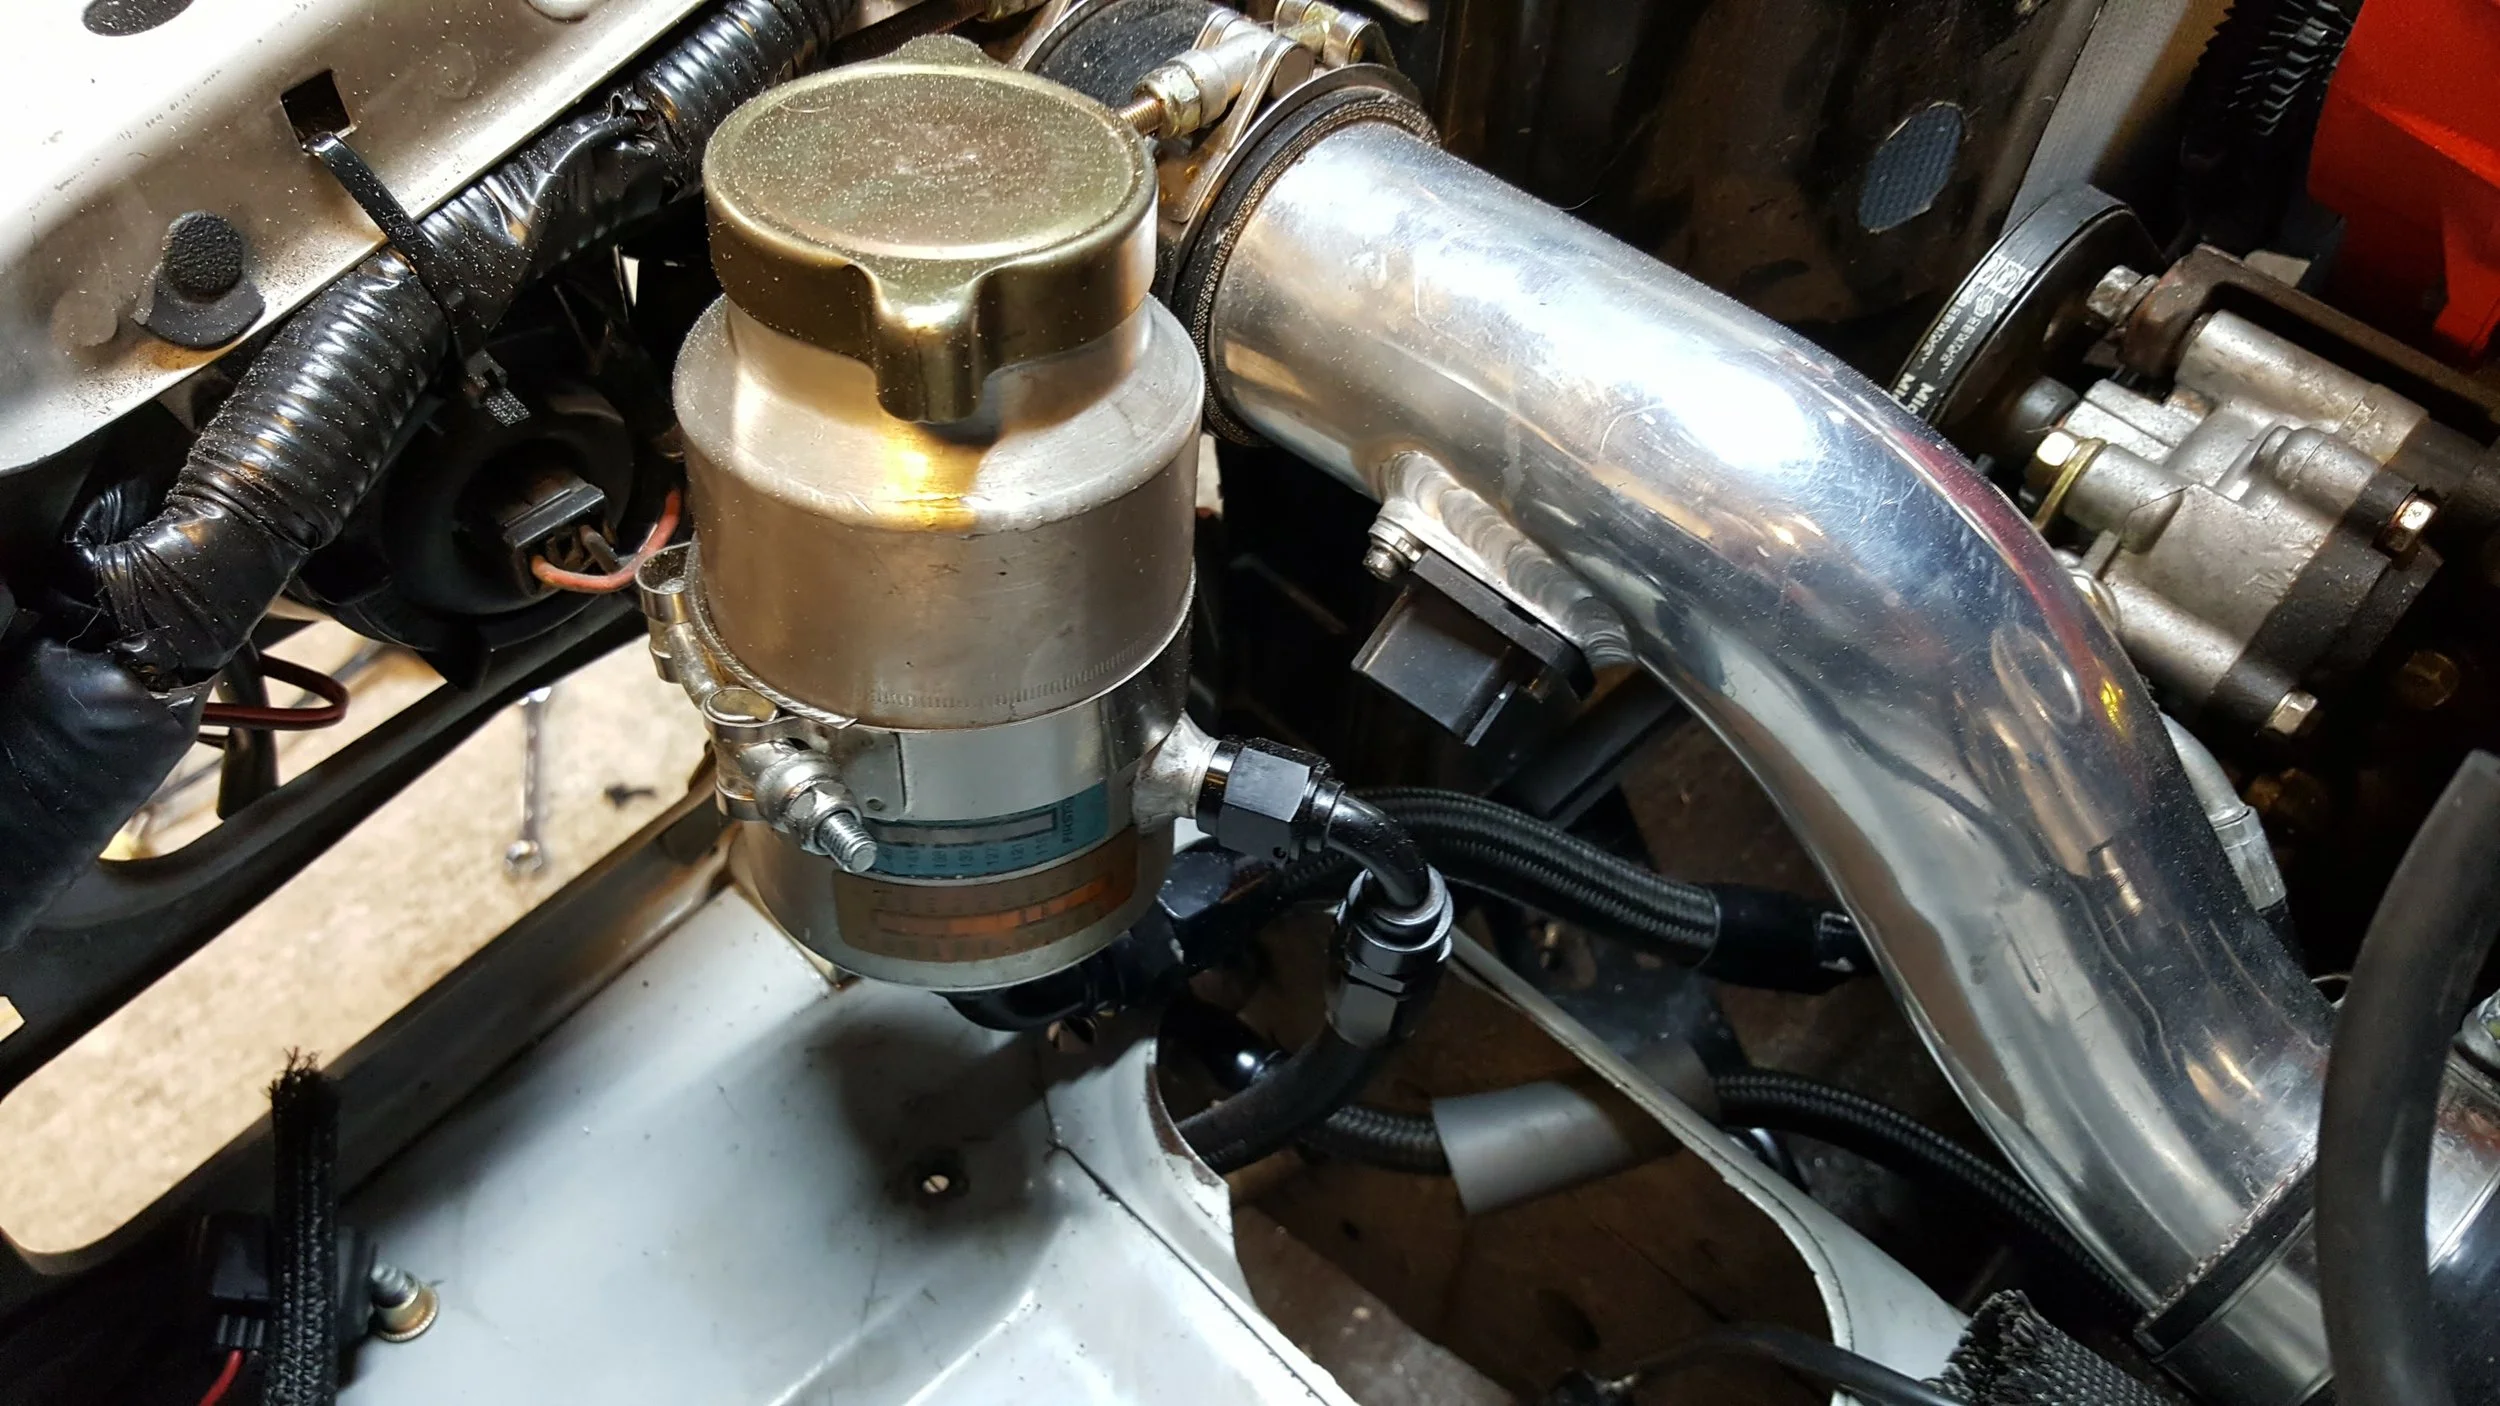
Because the compressor housing on the Trust T67 turbo is so big I couldn't fit the reservoir in the stock location so I ended up using a bracket and clamp to mount it behind the passenger headlight. Note the power steering pump in the picture above. The R32 came with an RB20 HICAS pump, which has a second outlet to feed fluid to the HICAS system. In the process of eliminating the HICAS I grabbed a new R33 non-HICAS pump off Yahoo Auctions for less than 10,000 yen. That allowed me to avoid having to plug the HICAS feed and I don't have to worry about an old and worn pump failing on me.

The return line from the pump to the reservoir is normally push-on, but I wanted the entire system to use fittings and braided lines. I had an -AN male fitting welded to the bolt-on flange for the return line to the reservoir.
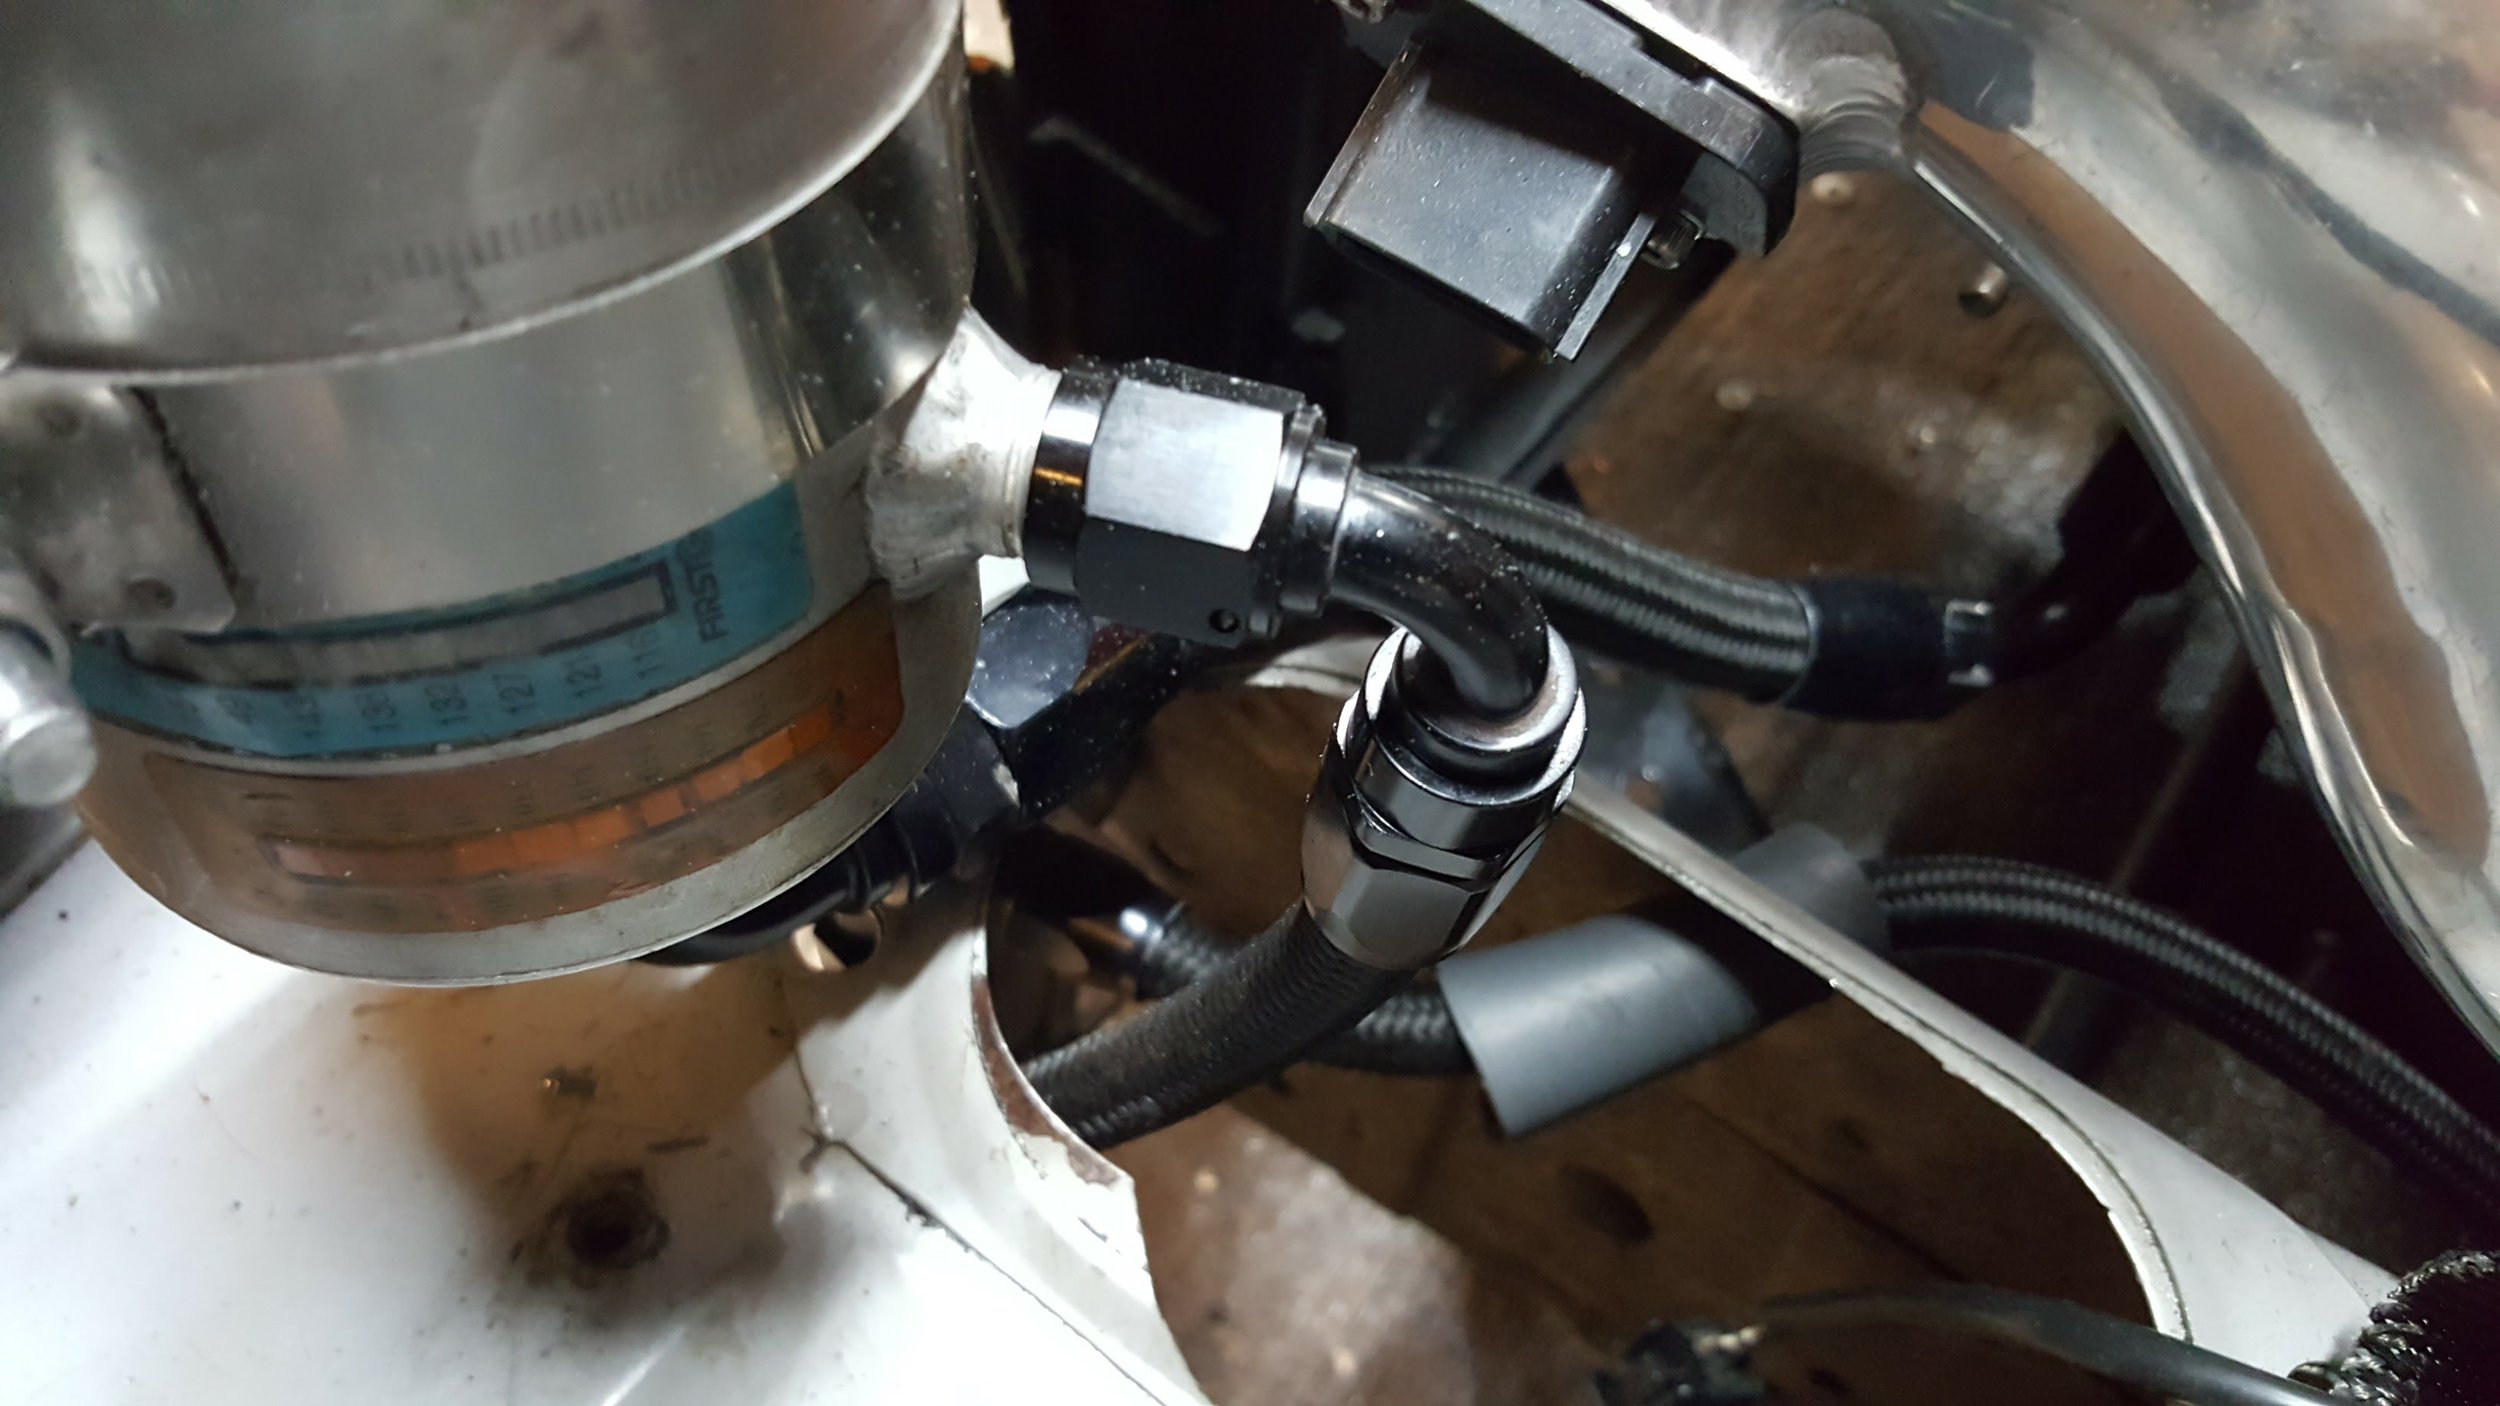
You can see the return from the pump feeding into the bottom of the reservoir above. The -6AN fitting on the side of the reservoir goes down to the cooler. There are nifty temperature stickers on the side of the reservoir. I have no idea if they actually do anything, but I saw no good reason to peel them off.

The shot above shows the line from the reservoir coming down and feeding into the right side of the cooler. You may have noticed how small the cooler is. It's actually one of the smallest Earl's makes. The power steering system wouldn't benefit from a large cooler on this car the same way the PS system on a competition car would. This is a "street" drift car afterall. The line on the left runs back to the return on the rack (low pressure line).

Instead of buying some random brackets I decided to make them out of steel stock that I had laying around. You can't see it in the picture, but I drilled and set some rivnuts for the brackets for a nice fit and finish.

I don't have a brake, but I do have a big ass welding bench which works well as the base of a make-shift brake. The plate on top is some random bracket I eliminated from the R32 a while back and decided to keep it for bending brackets like this. I can't get a straight 90 degree bend, but the slight curve doesn't bother me.

I'm happy with the way everything turned out. I haven't had a chance to test the new setup out as I'm fixing a fuel line issue and doing some cooling upgrades. I'm hoping the extra fluid in the system and cooler will eliminate the slightly heavy steering feel that shows up after a bit of drifting. Also, for those who might be wondering, those are Federal 595 RS-RRs in the picture.